A practical place to begin
Chard can be a generous crop, but it is not a miniature plant. Its broad leaves and thick stalks need space even when a seedling looks small. A few well-spaced plants, picked from the outside, often provide a more useful long harvest than a crowded row repeatedly cut to the ground.
Grow a small number of strong plants for repeated leaf and stalk harvests. Decide whether you want baby leaves or mature cooking leaves before choosing spacing and container size.
Choose the position and prepare
Use good light and enough room for mature leaves to spread. Partial shade may be useful in very hot conditions, but a dark corner slows regrowth. Keep the plants where outer leaves can be reached without trampling other crops.
Choose a large draining container or a prepared bed, potting mix appropriate for edibles, and clean scissors. Chard seed clusters may produce several seedlings, so plan to thin even when sowing appears sparse.
Sow at packet depth and separate plants early. Transplant young specimens carefully if using modules. A single large pot may be better used by a few plants with full root space than a ring of crowded seedlings.
A manageable care routine
Supply moisture consistently during active growth. Large leaves can wilt in heat even when the root zone is moist, so check before adding more water. Plants that recover as temperatures drop do not necessarily need repeated soaking.
Support repeated harvesting with balanced nutrition according to the mix and feed labels. Avoid stronger fertilizer in response to every pale leaf. Check whether lower leaves are simply old or shaded.
Take mature outer leaves and retain the growing centre. Remove damaged foliage, but leave enough healthy leaf area to replenish the plant. Rotate the harvest across several plants rather than stripping one bare.
Observe before changing the plan
Leaf spots require inspection and hygiene rather than automatic feeding. Crowding and wet foliage can make problems harder to manage. If plants send up a flower stalk after a seasonal change, plan replacement instead of expecting endless tender leaves.
Pick a small number of outer leaves from each plant and record regrowth. Increase the harvest only when new leaves keep pace. The sustainable amount changes with light, temperature, and the size of the root system.
Adapt and renew
Chard can tolerate cool conditions better than many warm-season crops, but local winters and summers vary widely. Choose varieties and sowing times recommended for your region rather than relying on a universal year-round claim.
Wash leaves thoroughly, separate damaged portions, and use clean harvest tools. Replace plants once the stand becomes unproductive or bolts. A new batch started before that point prevents a long gap in useful leaves.
Allow for the size the seedling will become
A young chard plant can look like a small salad seedling, but mature leaves occupy much more space. Decide whether the crop is for baby leaves or repeated mature leaves before filling a container. Baby-leaf density is a short-term system. Plants intended to remain for a longer harvest need room for roots, leaf expansion, and access to the outer stalks.
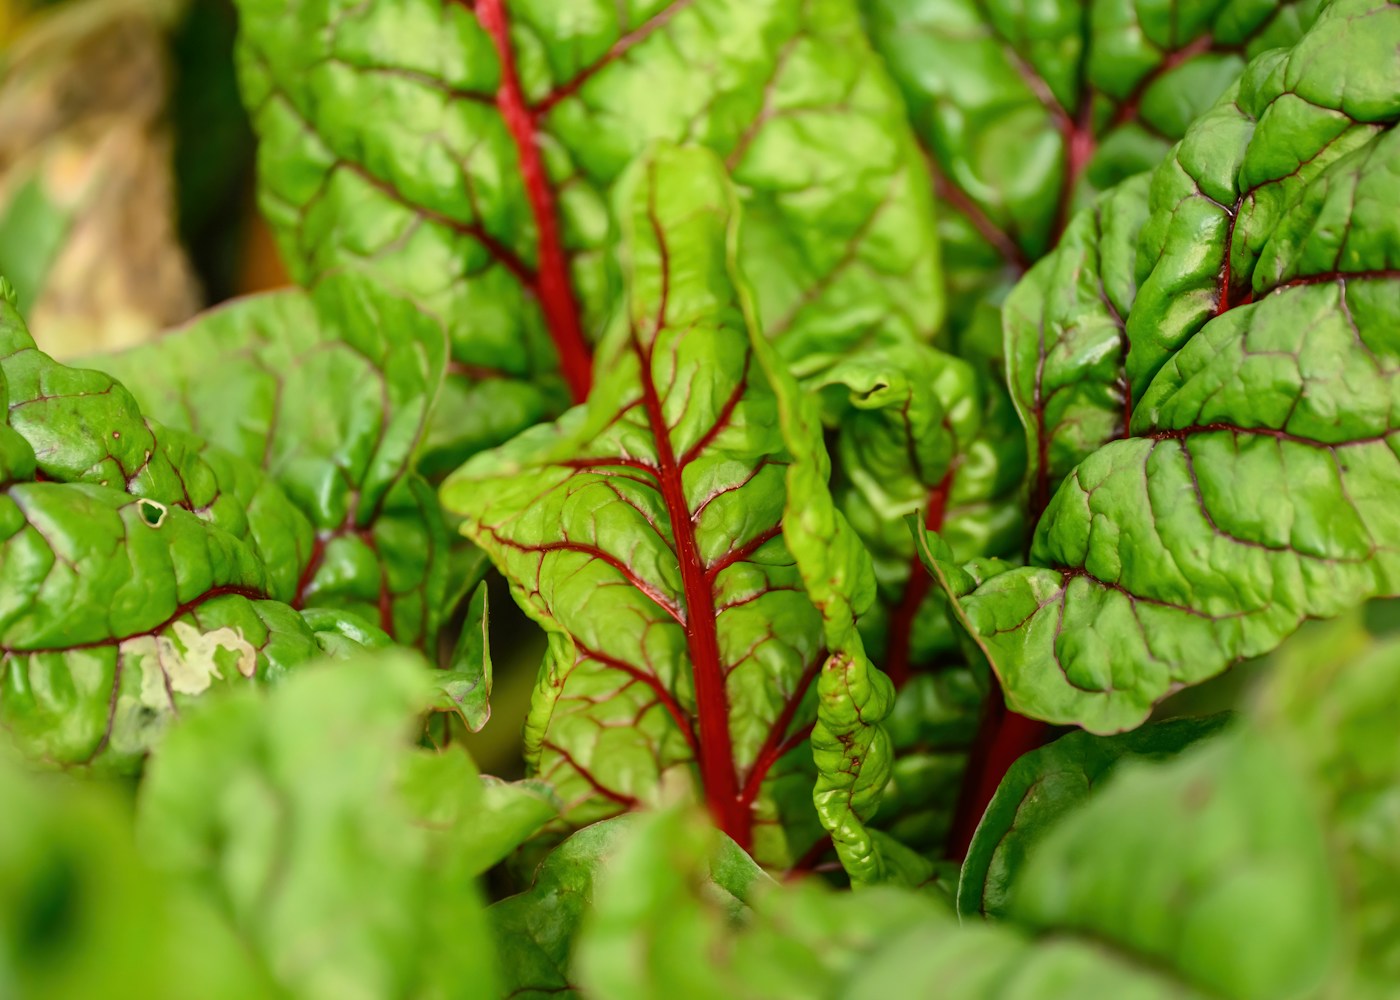
Read the variety description and spacing guidance. Colourful stalks can make chard attractive among ornamentals, but appearance does not reduce its growing needs. Place it where broad leaves will not shade every smaller herb nearby. A container with fewer strong plants is easier to water and harvest than a crowded pot whose leaves are always pressed against one another.
Chard seed clusters can produce more than one seedling, so a sparse-looking sowing may still need thinning. Separate or remove extras early rather than allowing several plants to compete from the same point. Keep labels until harvest so you can repeat a variety that suits your cooking. If you prefer tender small leaves, record that intention and harvest accordingly rather than waiting for every plant to become a large specimen.
Build an outer-leaf harvest rhythm
Begin substantial picking only after the plant is well established. Take selected outer leaves and leave the central growing area intact. Use a clean cut or a careful harvesting method that avoids tearing the crown. Removing all the largest leaves at once may leave too little working foliage for rapid recovery, particularly in a small pot or a dim period.
Spread the harvest across several plants. Notice how quickly new leaves replace those removed and adjust the amount you take. The same plants may support more picking in mild bright weather than in cold low-light conditions. A sustainable harvest is therefore an observation, not a fixed number of leaves per week.
Remove damaged or aging foliage separately from the kitchen harvest. It is useful to keep the centre visible so pests and new growth can be inspected. Do not confuse routine tidying with the need to strip a plant bare. If growth has slowed markedly, check moisture, root space, and season before asking for another large cut. A short rest can be more useful than extra fertilizer applied to a plant with little healthy leaf area left.
Manage the broad canopy on hot days
Large leaves can lose water rapidly in heat. Some temporary drooping may occur even when the growing medium is still moist, so check the root zone before repeatedly watering. If the plant recovers as the day cools, excessive additional water could leave roots too wet overnight. Persistent wilt in dry mix calls for a different response from persistent wilt in saturated mix.
Use a container with enough volume to buffer moisture and inspect it more often during wind. Water thoroughly when needed and let excess escape. A saucer can protect a surface, but it should not become a permanent reservoir around an ordinary pot. Keep drainage outlets visible and accessible as foliage grows.
Where local summers are very harsh, a position with some relief from intense afternoon exposure may help while still providing adequate light. Make changes thoughtfully rather than moving the plant between extremes each day. Record whether the new position improves leaf quality and regrowth. The crop’s broad leaves make environmental changes easy to see, but they do not identify the cause of every symptom without a moisture and position check.
Distinguish a long harvest from an endless one
Chard can remain productive for an extended period, yet it still responds to season and plant age. A change toward flowering alters the useful harvest. Once a strong flower stalk develops, repeatedly cutting it may not return the plant to the same leafy stage. Plan a replacement batch before the old stand becomes the only source of greens.
Keep a small sowing record with the first harvest and any major pause in growth. This shows which local sowing window gives the most useful season. A crop that performs well through a mild autumn may behave differently during a hot summer or a severe winter. Variety choice also matters, so avoid drawing broad conclusions from an unlabelled packet.
A modest succession can be simple: establish a few young plants while the older ones still yield, then remove the tired stand when the replacements are ready. Do not overcrowd the same container to achieve that overlap. Separate root space lets the young plants develop without being shaded and outcompeted. A small backup pot often provides more dependable continuity than trying to maintain every old plant indefinitely.
Keep leaf quality and hygiene visible
During harvest, inspect both sides of leaves and the lower stalks. Spots, holes, and yellowing have different possible causes. Remove clearly decayed tissue and obtain a reliable diagnosis if a problem spreads. Avoid assuming every pale leaf needs feed, since old shaded leaves naturally decline and root problems can also affect colour.
Use only treatments labelled for edible chard in the relevant setting and follow harvest intervals. Household mixtures are not automatically suitable for food leaves. Wash the harvest thoroughly under clean running water and use clean tools and containers. Keep the growing area away from contamination by dirty runoff or animal waste.
At the end of the crop, remove residues appropriately and inspect the root environment. A very dense root ball, persistent wetness, or badly depleted mix may explain declining performance. Record the useful yield in terms of meals rather than maximum leaf size. Chard is rewarding when a few plants give regular clean leaves that suit the kitchen. A huge crowded plant that is difficult to pick is not necessarily the more productive choice.
Measure success by regrowth
Imagine three chard plants in a large pot. One is picked heavily because it is closest to the path, while the other two remain mostly untouched. After several rounds, the nearest plant looks weak. Before adding feed to the whole container, compare the harvesting history. The difference may be leaf removal rather than nutrition.
Spread future picking across the plants and let the depleted one retain healthy growth while it recovers. Check moisture throughout the pot and remove only damaged material. If new leaves develop steadily, adjust the routine rather than replacing the entire planting. If all three slow together, examine season, root congestion, and growing conditions.
Record the amount that supports a useful meal without leaving the plants bare. This is a more practical guide than a universal number of leaves. A bright mild period may permit frequent picking, while cold low-light weather calls for restraint. If demand repeatedly exceeds regrowth, establish a separate replacement or additional suitable container instead of squeezing more plants into the existing root space. The crop’s long harvest potential depends on pacing. Let the plants show how much they can replace, then plan meals and succession around that response. When bolting or persistent decline eventually ends the useful period, clear the stand deliberately and carry the observations into the next sowing.
Further reading
Horticultural references for continued learning: