A plant that stores its own breathing room
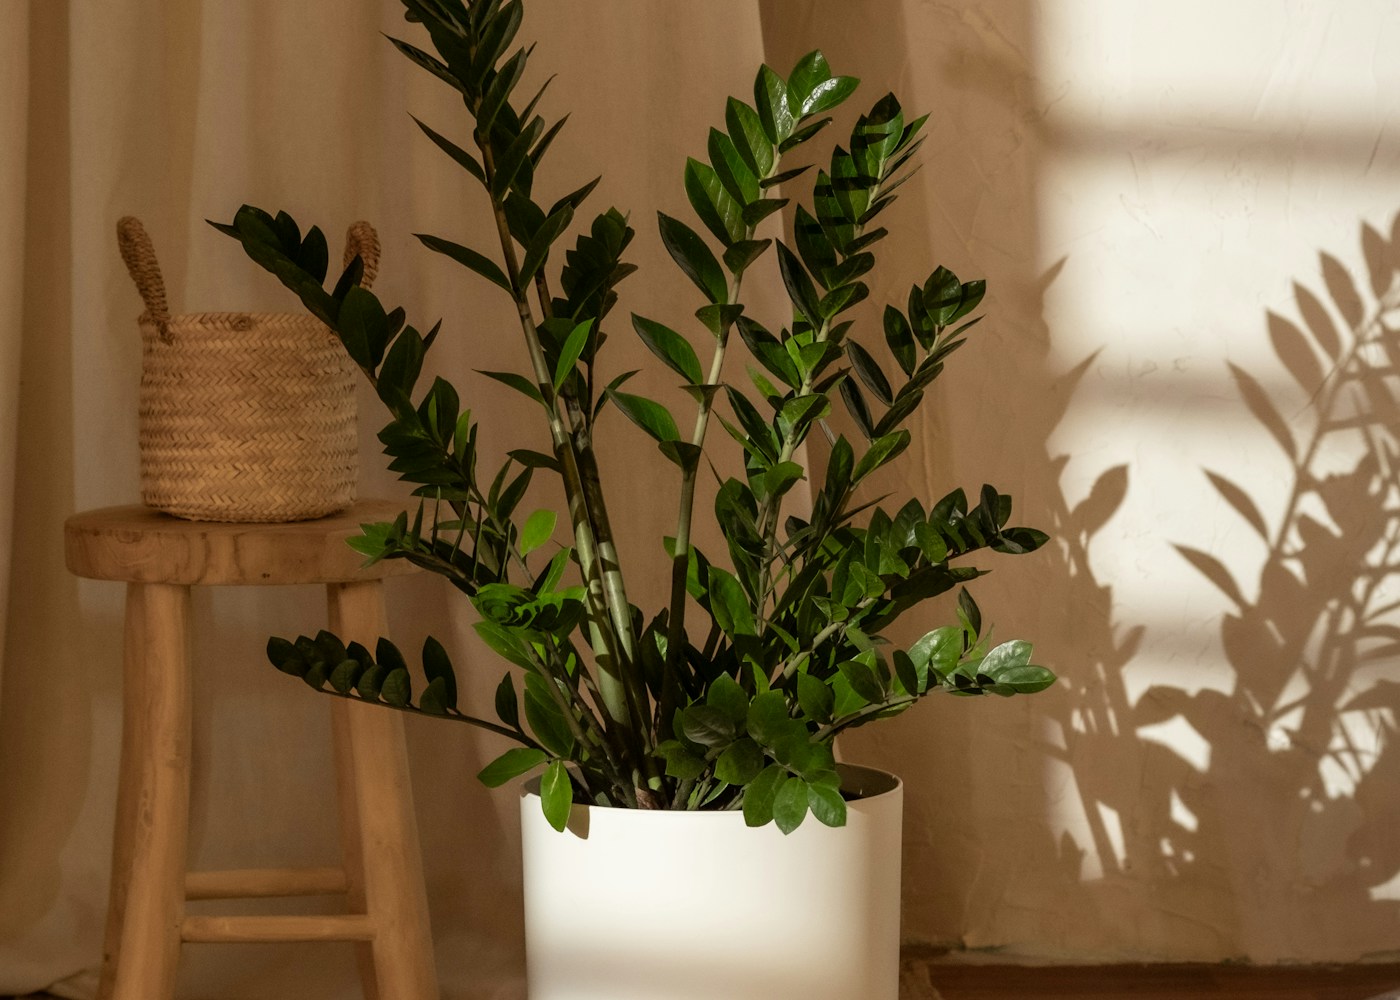
A ZZ plant can remain composed while more demanding houseplants wilt. Zamioculcas zamiifolia has thickened underground rhizomes and fleshy roots that store water, supporting glossy upright leaves through dry intervals. That reserve makes it forgiving, but it also means unnecessary watering can linger around roots that are not ready for another drink. The best routine often involves checking the pot and deciding to leave it alone.
What looks like a stem carrying many small leaves is, botanically, a compound leaf with leaflets along a thick stalk. New growth emerges from the base as a tightly grouped spear and unfolds gradually. It does not branch like a woody shrub when you shorten the upper part. Understanding that structure prevents a common disappointment: cutting every stalk halfway down will not turn a tall ZZ plant into a bushy miniature tree.
Expect steady development rather than constant change
ZZ plants can produce several new shoots during a favorable growing period and then appear unchanged for a long time. Their pace depends on light, warmth, root condition, cultivar, and the size of the plant. A pause does not automatically justify more water or fertilizer. Look at the firmness of the existing leaves and the condition of the mixture before interpreting slow visible growth as distress.
Fresh growth may emerge paler than older foliage and darken as it matures. Dark-leaved cultivars can show an especially noticeable transition. Do not remove a healthy pale new shoot because it fails to match the rest of the plant immediately. Support its development with suitable light and normal root care. Sudden blackening, collapse, or softness is a different sign and requires checking for root or tissue damage rather than waiting for normal color development.
Use low-light tolerance intelligently
A ZZ plant is useful where many sun-loving houseplants would struggle, but low-light tolerance is not the same as an ability to live without light. Near a bright window with filtered daylight, it generally has more energy for new growth than in a distant hallway. A dim location may slow water use dramatically. That matters because a watering pattern that worked near the window may become excessive after the plant is moved farther inside.
If the desired display spot receives almost no daylight, consider suitable supplemental lighting or choose a different location. Rotating the plant to face the window can improve balance but does not compensate for a dark room. Avoid sudden exposure to intense direct sun, which can scorch leaves accustomed to shade. Leave space from hot glass, cold panes, and drafts. A stable moderate indoor temperature suits the plant better than a position that swings between extremes.
Check the lower mixture before watering
The surface can look dry while the lower pot remains damp around the rhizomes. Lift the pot to assess its weight and check moisture deeper near the edge. In a deep container, this second check is particularly valuable. A cheap probe is not infallible; its reading depends on the medium, salts, and contact. Use observations together rather than treating a single number or a dry top layer as an automatic instruction.
For an established ZZ plant, let the mix dry thoroughly between waterings. Then wet it evenly and allow all surplus to drain. Do not leave water in a decorative cover, and avoid giving a tiny precautionary splash every few days. Those small additions can keep the root zone persistently damp without providing a clear wet-to-dry cycle. Cool or dark conditions can make the interval quite long; the plant has no obligation to follow a weekly household schedule.
Choose a container that makes inspection easy
A nursery pot with drainage holes inside a removable cover is practical because it lets you inspect roots, lift the plant, and drain runoff. A sealed decorative pot requires far more guesswork and is a poor starting point. Keep the container proportionate to the root system. Large rhizomes need room, but a small plant surrounded by a deep volume of unused moist mixture is harder to manage than one in a comfortably fitted pot.
Plastic slows evaporation compared with porous terracotta. Either can work if the mixture and watering pattern suit the room. A heavy outer vessel can stabilize tall arching growth without forcing an increase in wet growing medium. Check that the inner pot does not sit tightly against the bottom where runoff pools. If it is difficult to remove, use a suitable spacer that still allows drainage and an easy way to empty the outer pot.
Read yellowing as a pattern
One oldest leaf can yellow as it ages. Several yellowing stalks, particularly with wet mixture or soft bases, raise concern about excessive moisture and damaged roots. A plant that has remained dry for a prolonged time can also shed foliage to conserve resources. These possibilities require different responses, so look at the root zone before watering or feeding. The color alone does not tell you whether the plant wants more or less water.
If a stalk has fully yellowed, remove it near the base with a clean sharp tool. A cut across the middle leaves an unattractive stump and does not encourage the remaining portion to branch. Retain healthy leaves where possible because they support the underground growth. After correcting the cause, judge recovery through firm tissue and eventual sound new shoots. Old yellow leaflets will not become glossy green again simply because care improves.
Repot when the root system demonstrates a need
ZZ rhizomes can eventually press against and distort a nursery pot. Roots densely filling the container, difficulty watering evenly, and repeated very rapid drying can indicate that repotting is useful. Choose a modest increase in size and use fresh free-draining potting mix. A suitable houseplant mixture with coarse structural material can work; the key is that it holds enough moisture for the roots without staying dense and saturated.
Remove the plant carefully, supporting the root mass rather than pulling hard on leaf stalks. Firm pale or tan roots may be healthy even if they are not pristine white. Cut away clearly soft decayed tissue using clean tools. Keep rhizomes near their original planting depth and do not bury the bases deeply to create a tidier outline. Settle the mixture gently, water according to its initial moisture, and check the new drying behavior over subsequent weeks.
Divide a large specimen with enough reserves
Division is the most direct way to create another substantial ZZ plant. Look for naturally separable groups of rhizomes, leaves, and roots. Each division should retain a sound storage structure and useful roots rather than only a loose leaf stalk. Separate carefully, making clean cuts where necessary. Let fresh wounds dry appropriately before prolonged exposure to wet mix, and pot the pieces into containers matched to their reduced root systems.
Leaflet and leaf cuttings are possible but much slower. A cutting may spend a long period forming underground structures before any new shoot appears. Firm tissue can remain unchanged for months, and repeatedly digging it up to check progress is counterproductive. Use a clean airy rooting setup and modest moisture, avoiding the assumption that lack of top growth means it needs more water. For a quick new display, a healthy division or purchased young plant is more predictable.
Feed lightly and clean with a plain damp cloth
Apply a suitable houseplant fertilizer at the labeled dilution when the plant is actively growing. A ZZ plant does not need a strong feed every time it receives water. In low light or during a long pause in growth, extra fertilizer is unlikely to create the missing energy for new shoots. If the mixture develops mineral crusts, review fertilizer concentration and water quality before adding another product.
Dust is particularly visible on the glossy leaflets. Wipe gently with a soft damp cloth, supporting the leaf as you go, and inspect both surfaces for scale or mealybugs. Oil-based homemade polishes can leave residues and make future pest inspection harder. Clean the decorative pot and check underneath for trapped water at the same time. Because the plant is often left undisturbed for long intervals, this brief handling is a useful chance to notice changes early.
Keep safety and placement practical
ZZ plant tissues contain irritating calcium oxalate crystals and should not be eaten. Keep it away from pets or children who chew foliage, and wash hands after propagation or pruning. Gloves are sensible if sap irritates your skin. Its reassuring appearance should not be treated as evidence that every use is harmless, and it should never be presented as an edible or medicinal houseplant.
Imagine a ZZ plant moved from a bright office window to a dim reception desk. The leaves still look sound, so the old weekly watering continues. After several weeks, lower stalks yellow and the pot remains heavy. The useful correction is to inspect the roots, remove trapped water, improve the light if possible, and replace watering by date with checks of the actual mixture. The plant's slow rhythm becomes much easier to respect once the routine follows its root reserves and growing conditions.
A ZZ plant can shed individual leaflets after significant stress, and those fallen pieces should be removed from the pot surface before they decay. Check whether the leaf stalk itself remains firm. If it does, there is no need to cut it solely because one leaflet is missing. If several leaflets detach while the base softens, inspect the root system promptly. Keep the diagnostic sequence simple: moisture, drainage, root firmness, then light and temperature history. This order avoids adding fertilizer to a plant whose immediate problem is damaged underground tissue.
Further reading
Horticultural references for continued learning: